Meteor M-N2 Images

Showing posts with label hamradio. Show all posts

Thursday, 28 December 2017

Homebrew SDR HF Transceiver - Listening to the receiver in SDR#

I recorded this video of the I/Q outputs fed into my computer with the demodulation being performed by sdr# (now with audio)


The large central spike is, I think, bleed through from the local oscillator signal.

My next task is to measure the loss in the receiver and also look at whether there is a ground loop problem.

Next post: Introduction to the microcontroller processing.

Homebrew SDR HF Transceiver - Quadrature Divider

We are now at the point where we need to take the signal from the Si5351, divide it by 4 and produce two outputs, one of which is 90 degrees out of phase from the other.

A good tutorial on this process is here although we will divide by 4 rather than 2. The datasheet for the 74HC74 is here. The 74AC74 and 74HC74 are more or less interchangeable, the difference being that one can handle higher frequencies than the other.

There are many circuits on the Internet for quadrature dividers but I used one that is used in the SoftRock Ensemble receiver, here. The only difference being that the outputs to QSD CLK0 & CLK1 are not used, however, note that pin 9 does need to be connected to pin 2 (it took me a while to figure that was the reason I couldn't get it to work). Pin 14 is fed with 5V from the 7805 regulator and pin 3 is fed from CLK0 output on the Si5351. The outputs from pin 5 and 8 are individually fed to the LO ports on ADE-1 #1 and ADE-1 #2.

Below is my version, it looks a bit messy but it works.


The screenshot from my oscilloscope shows the two out of phase outputs from the quadrature divider in yellow and blue. The purple line shows the that these two outputs have been divided by 4 and are at a frequency of 7.100 MHz.


We are now ready to see what this thing can receive by taking the I & Q outputs from the audio LPF's to a stereo jack plug (I to left channel, Q to right channel or vice versa plus ground) and plugging it into our computer to listen to the signals using SDR# but finally a picture of the completed RF splitter, mixer, AF low pass filter, regulator, quadrature divider board.


I was going to mount the Si5351 breakout board onto the two posts top right but I think the board uses imperial screw size holes as my M3 screws will not quite fit.

Next post: Connecting to SDR#

Homebrew SDR HF Transceiver - the Si5351

The Si5351 is "...an I2C configurable clock generator that is ideally suited for replacing crystals, crystal oscillators, VCXOs..." That is to say that it can generate frequencies from 2.5 kHz up to 200 MHz. Adafruit Industries produce a breakout board with the Si5351 chip and other required components installed for under $8, this allows us to interface with a microcontroller, e.g. Arduino, and control the frequencies produced very easily. The breakout board allows us to generate three frequencies but for this project we will only be using one of the outputs. We will produce a frequency that is four times the LO frequency we require, when the signal goes through the quadrature divider (74AC74 flip-flop) it will be divided by four to produce the LO frequency.

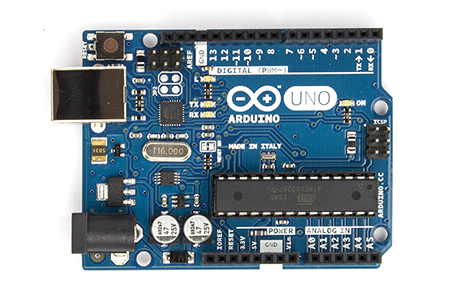
Adafruit Si5351 breakout board on the left, Arduino Uno on the right.


The connections are simple: +5V and GND from the 7805 regulator, pin A4 from the Arduino Uno connected to pin SDA on the breakout board and pin A5 connected to pin SCL. 

I have hacked the example program below, it sets the Si5351 to a default frequency of 28.4 MHz, i.e. 7.1 MHz after the divide by 4, and by using the serial monitor window in the Arduino IDE you can change frequency in 1 kHz steps up (1) or down (2), or 100 Hz steps up (+) or down (-). This frequency is output on CLK0 - the next step is to connect CLK0 to the 74AC74 flip flop.

You will need to install the Si5351 library by following the instructions here.


/*
 * si5351example.ino - Simple example of using Si5351Arduino library
 *
 * Copyright (C) 2015 Jason Milldrum <milldrum@gmail.com>
 *
 * This program is free software: you can redistribute it and/or modify
 * it under the terms of the GNU General Public License as published by
 * the Free Software Foundation, either version 3 of the License, or
 * (at your option) any later version.
 *
 * This program is distributed in the hope that it will be useful,
 * but WITHOUT ANY WARRANTY; without even the implied warranty of
 * MERCHANTABILITY or FITNESS FOR A PARTICULAR PURPOSE.  See the
 * GNU General Public License for more details.
 *
 * You should have received a copy of the GNU General Public License
 * along with this program.  If not, see <http://www.gnu.org/licenses/>.
 */

#include "si5351.h"
#include "Wire.h"
Si5351 si5351;
char incoming_char;
long serial_input_number, serial_input_number1;
void setup()
{
  // Start serial and initialize the Si5351
  Serial.begin(57600);
  si5351.init(SI5351_CRYSTAL_LOAD_8PF, 0);
  // Set CLK0 to output 7.1 MHz with a fixed PLL frequency
  si5351.set_pll(SI5351_PLL_FIXED, SI5351_PLLA);
  si5351.set_freq(2840000000ULL, SI5351_PLL_FIXED, SI5351_CLK0);
  serial_input_number1 = 7100000;
}
void loop()
{
 if(Serial.available()>0){
    incoming_char = Serial.read();
    switch(incoming_char){
    case '1': //up by 1kHz
      serial_input_number1 = serial_input_number1 + 1000;
      serial_input_number = serial_input_number1 * 4;
      si5351.set_freq((serial_input_number) * 100ULL, SI5351_PLL_FIXED, SI5351_CLK0);
      Serial.println(serial_input_number1);
      break;
    case '2': //down by 1kHz
      serial_input_number1 = serial_input_number1 - 1000;
      serial_input_number = serial_input_number1 * 4;
      si5351.set_freq((serial_input_number) * 100ULL, SI5351_PLL_FIXED, SI5351_CLK0);
      Serial.println(serial_input_number1);
      break;
     case '+': //up by 100Hz
      serial_input_number1 = serial_input_number1 + 100;
      serial_input_number = serial_input_number1 * 4;
      si5351.set_freq((serial_input_number) * 100ULL, SI5351_PLL_FIXED, SI5351_CLK0);
      Serial.println(serial_input_number1);
      break;
     case '-': //down by 100Hz
      serial_input_number1 = serial_input_number1 - 100;
      serial_input_number = serial_input_number1 * 4;
      si5351.set_freq((serial_input_number) * 100ULL, SI5351_PLL_FIXED, SI5351_CLK0);
      Serial.println(serial_input_number1);
      break;
    }
    Serial.flush();   
  }
}
A 7805 regulator circuit used to convert ~12V to 5V is here.

When you run the Arduino sketch you should be able to hear the output from the Si5351 on an HF receiver at 28.4 MHz

Next post: Quadrature Divider

Wednesday, 27 December 2017

Homebrew SDR HF Transceiver - Adding the ADE-1 Mixers

The ADE-1 is a passive device with an RF and LO input and an IF output. Two ADE-1's are used with the RF port on each being fed with output from port 1 and 2 of the RF splitter respectively (Note: I changed the design of the RF splitter from that which I first published, here is a link to the updated page). The LO ports will be fed from one of the two outputs of the 74AC74 flip-flop respectively. The output of the IF ports goes to an audio frequency LPF (one LPF per port).

The theory behind how the I & Q signals are produced are described in this excellent YouTube video by Craig, devttyS0. In short the LO outputs are produced by dividing the signal from the Si5351 by 4, there are two outputs from the 74AC74 at the LO frequency and one is 90 degrees out of phase from the other. When each one of these is mixed with the RF in the ADE-1 we end up with two outputs at baseband audio frequency, I & Q, one being 90 degrees out of phase from the other as shown below:


The audio LPF that follows each RF output I copied from EA4NZ

Source: EA4NZ
Below you can see a picture of the RF splitter, ADE-1's and audio LPF's. The 7805 and assorted capacitors in the top right is the 5V supply for the 74AC74.


I note from devttyS0's video that the FST3253 device removes the need for the two ADE-1's by implementing a Tayloe Detector - something to be tried.

Next post: The Si5351

Friday, 15 December 2017

Homebrew SDR HF Transceiver - RF Splitter

The RF splitter is used to split the incoming RF into two equal parts. These individual signals are then used as input to the ADE-1 mixers that produce the I & Q signals (90 degrees out of phase). Obviously you don't want to lose too much power in the splitter circuit and you want to ensure that the two output signals are of equal magnitude.

Update: 27 Dec 2017. The splitter design I originally used did not produce zero phase difference. Hence I have updated this page with another design.

I built this splitter based on a design from EMRFD (Experimental Methods in RF Design, Hayward, Campbell & Larkin), specifically the one from the 18 MHz transceiver shown in Fig. 11.14.

The schematic is below:


I used an FT50-43 toroid with 6 bifilar turns.

My built version can be seen in the picture below.


The picture below shows the outputs from ports 1 and 2. They are equal in amplitude and in phase which is perfect.


Next post: Adding the ADE-1 mixers

Wednesday, 13 December 2017

Homebrew SDR HF Transceiver - Band pass filter

The band pass filter (BPF) is used to filter out strong signals from outside of the frequency band of interest. I have built a 7MHz BPF so the receiver will initially be limited to the 40m band. However, to cover other bands a BPF will be required per band and switched in and out of circuit as the receiver is tuned to the different bands.

I used a circuit that I found on VK4FFAB's site, I initially built this as input to a NE602 mixer where the impedance needs to be 1500 ohms but for this project replaced the 270 & 18 pF capacitors with 220 & 56 pF ones to create 50 ohm output.

The circuit schematic is below, the output is chopped off but is just to the right of the 18pF capacitor with the output of the 18pF capacitor carrying the signal to the next stage.


Credit: VK4FFAB


The Elsie (filter design tool) plot for this is:


My built version looks like this:


Having built the circuit I connected my Wideband RF Noise Generator to the input of the RF amp and the output of the RF amp to the input of the BPF. I then connected my oscilloscope to the output of the BPF and used the FFT function to plot the frequency that the filter passes through. 

The result is shown below. The yellow line is the signal from the wideband noise generator, the purple line shows the response of the filter centred nicely on 7.1 MHz. 


The variable capacitors in the circuit can be used to fine tune the centre of the filter. If you don't have an oscilloscope then a cheap'ish device like the Yaege FC-1 can also be used. I have one of these and it can be used to measure very low power. Using a short piece of coax connected to the BNC connector with two crocodile clips or similar connected to the centre and braid at the other end of the coax you can connect to the output of the BPF and ground. If you input a very low power at 7.1 MHz into the BPF you can then tune the capacitors in the BPF to give maximum power output meaning that the circuit should be tuned to pass most power at 7.1 MHz.

You can also use the FC-1 to check that the RF amp is amplifying an input signal.

Next post: RF Splitter.

Homebrew SDR HF Transceiver - RF Amp

The RF amplifier is the first component of the receive chain. It is used to amplify the incoming signals and this circuit provides about 7dB of gain, a little over multiplying the incoming signal by 5.

The amplifier is called a Termination Insensitive Amplifier (TIA) and is taken directly from the 2009 paper describing TIA's by W7ZOI & K3NHI. In the paper this amp is the one in Figure 6. The benefit of a TIA is that it is not affected by the termination impedance of the preceding or following stages so we have one less potential issue to think about. In the final transceiver I will build a bidirectional TIA but for now and to get things moving on the receive side I settled on this design. KK9JEF has a good video showing how TIA's work.

Directly copied from W7ZOI & K3NHI's paper the circuit is:
Credit: W7ZOI & K3NHI

In my version I used ceramic capacitors for the 0.1uF bypass capacitors rather than the electrolytics shown in the circuit. The 4.3K ohm resistor is not a standard value so I used a 1K ohm and a 3.3K in series (1K + 3.3K = 4.3K)

The input to the amp is the connector shown on the bottom left of the circuit and the output is the one on the right hand side. Below is a photograph of my build.


You can see that I have used an SMA connector on the output port. Since I took the picture I have also added an SMA on the input. I've decided that I like using these as it means I can disconnect and reconnect modules easily. I bought a bunch of sockets and crimp plugs (for use with RG174 coax) on ebay. However, there is no reason as far as I know why you shouldn't solder the coax centre and braid to the board directly as I have done many times before.

As an FYI here is a close up of the SMA connector on the board. I just scraped the copper away with a knife and checked with a multimeter that the copper the centre pin is soldered to was not connected to the rest of the board.


Finally I connected a signal source to the input (AD9850 and Arduino, see here) and using my oscilloscope measured the gain at several different frequencies. Yellow line is the input and blue line is the amplified output. At 10 MHz the gain is about 8dB and you can see that at 14 MHz the gain has started to drop.


3 MHz

7 MHz

10 MHz

14 MHz


Next post: Band pass filter.

Homebrew SDR HF Transceiver - Introduction

In 2016 I spent some time working on a VLF/LF receiver by I2PHD that was fully software defined, see here. The challenge of this approach is the speed of the ADC and subsequent processing that is required within a microcontroller. There just were not enough clock cycles to implement a waterfall display for example.

Recently I have been looking at the YouTube channel of Charlie Morris, ZL2CTM, who has built a software defined radio (SDR) using a Teensy microcontroller. Charlie doesn't give a whole lot of details about how to build this radio but I decided I wanted to try it out. Edit: I have also been looking at VE3MKC's blog, I thought VE3MKC and ZL2CTM were the same person but it appears that they have been doing the same thing independently. My thanks to them both for the inspiration and for the information they have published.

Given my experience with the VLF/LF receiver and the ST Microelectronics boards I used as well as the fact that I have three of these boards here I decided to build my version ZL2CTM's HF SDR receiver and transmitter that will be standalone, i.e. it will not require a PC to operate.

The block diagram below shows the main components of the transceiver although as most components are shared between transmitter and receiver I haven't bothered to put the transmit components in the diagram. When I come onto that area I will add them. I have included a description of the function of each block.


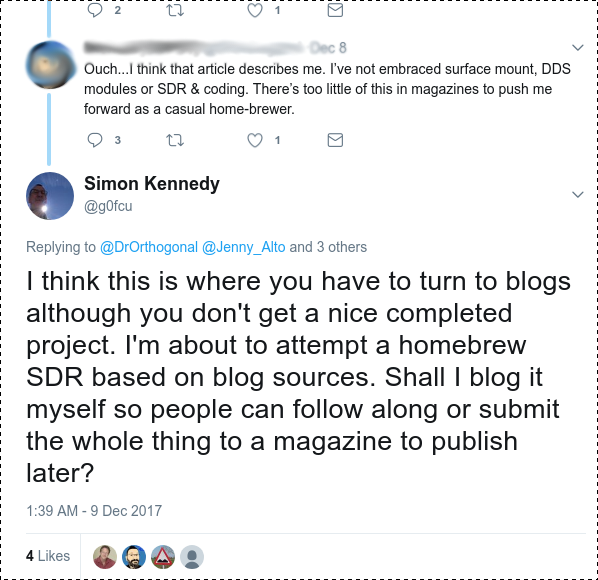
Originally I had not planned to blog about this build but a post on Hackaday bought forth some comments on Twitter:


Consequently, I couldn't really not blog about this project.

I could say that all the individual parts of this project are simple enough but I frequently come across projects or circuits that leave out descriptions of a 'simple' part of the circuit because the experienced builder just cannot believe that not everybody knows what they know. Consequently, I will try to explain each section as I go along or provide a link to a resource on the Internet that does a much better job of describing it than I ever could. All components except the ADE-1 are through hole components and I will build Manhattan style. The ADE-1 can (just) be mounted in this way. After I complete this project I would like to try to build the same circuits using only SMD parts as a follow up.

My choice of the STM32F746-Discovery board is mainly because I have one here. It costs about $55 and, although there does seem to be a bit of a lead time in the UK at the moment (December 2017), it is still in production and is fantastic value for money. It contains an ARM Cortex-M7 microprocessor, ADC's (analogue-digital controller), DAC's (digital-analogue controller), ethernet, micro-SD card interface, audio line-in/out and a 4.3" colour LCD-TFT screen with capacitive touch input among other features. You'd be hard pressed to find a 4.3" capacitive touch LCD alone for the same price on e-bay.

If I hadn't found that ST have recently licenced DSP Concepts Audio Weaver software for use royalty-free on ST devices this project wouldn't be going ahead but the Audio Weaver software is fantastic. It will enable me to design the software audio processing parts of the solution on a PC (sadly it doesn't work on Linux, even under Wine) and tune these in real time while they are deployed to the STM32F746 device. When the tuning is completed the code can be deployed standalone to the microcontroller. In fact, at the moment I think that the hardest part of this whole project is going to be building the graphical user interface, for which I will use STemWin, another piece of software that ST licence for their customers to use royalty-free.

What will you need if you plan to join in with me in this project? I am going to make the assumption that you have built some electronic circuits or kits before, firstly I'll build the RF components that produce the I/Q outputs that will be fed into the STM32F746:

Soldering iron and other tools you use to build circuits
Several pieces of single sided copper clad board like this
MeSquares to enable Manhatten style construction
RG174 or similar thin co-axial cable to link the RF stages
Si5351 breakout board, available from Adafruit and other resellers
74HC74 D-type flip flop
2 x ADE-1-24 frequency mixers or the non-SMD but more expensive equivalent (SBL-1)
A handful of 2N3904 transistors
There will also be some resistors, capacitors and ferrite cores required that I will detail as I go along.
The STM32F746-Discovery board from your favourite electronics reseller, Farnell & RS stock them in the UK amongst others or direct from ST

If you already have an oscilloscope with FFT function then I suggest you build a wideband RF noise generator which will be useful to test the RF amp and bandpass filter. I built one like this because it uses the ubiquitous 2N3904 transistors but many designs are available on the web.

Finally, a warning. This will be a learn as you go along project and if you follow along you need to be prepared to trouble shoot and fault find. As it stands at the moment I believe that it will be possible to build a transceiver as described above. What I do know is that we will all learn something and prove that not all of us are "Radio Amateuring like it's 1975"!

Next post: The RF amp.


Sunday, 7 June 2015

Transmitting video with a HackRF Blue

Picture of the video of my garden transmitted by my HackRF Blue
In the UK much digital amateur television (DATV) is transmitted using the DVB-S standard. This is the standard used in Europe to transmit standard definition satellite television.

Eventually I aim to transmit video through my local DATV repeater. What I have done is to prove the feasibility of using a HackRF Blue to act as the radio frequency part of the system.

I have drawn a diagram showing the individual components I used and I will go on to describe each in more detail.
Camera
I have used a standard DV video camera (Canon MV450i). It is possible to substitute this for a standard webcam. 

Computer
I use a 4 core Intel Core i5-2400, 3.10GHz CPU with 4Gb of memory. Operating system is xubuntu 14.04.

dvgrab
This software is used to grab the DV stream from the Firewire port that the DV camera is connected to. If you use a webcam then it is not necessary to use this program. It can be installed from the Ubuntu Software Centre or via the Kino pages.

ffmpeg
ffmpeg is used to convert the raw video stream grabbed by dvgrab into an MPEG-2 transport stream. If you are using a webcam you will need to change the parameters for the input source and the input video codec. It can be installed from the Ubuntu Software Centre or from the ffmpeg site.

The output from ffmpeg is sent to a fifo file to be consumed by the gnuradio program.

gnuradio
I have gnuradio installed via pybombs and am currently running version 3.7.7. Ron Economos has written the gnuradio blocks to enable DVB-S to be transmitted. You will need to download & install these from github. Included in the download is a gnuradio-companion flowgraph. Open this in gnuradio-companion to verify that you have installed the DVB-S gnuradio blocks in the correct place. If blocks show up as red then you haven't. However, Ron's code does not use a HackRF so I have changed the output sink to be a HackRF. You may also want to change the input to be a mpeg-2 transport stream file for testing and/or to reflect the location of the fifo file on your system.

You can download my HackRF version of the transmit program from here and edit it to change the reference to the directory I used for my fifo file to the one on your machine.

Example commands

One off commands

  • mkdir ~/dvb-s
  • cd ~/dvb-s
  • mkfifo mpeg2.fifo

Command to run dvgrab and ffmpeg

cd ~/dvb-s

dvgrab - | ffmpeg -re -thread_queue_size 1000 -i /dev/stdin -vcodec rawvideo -f alsa -i hw:0,0 -acodec mp2 -s 640x480 -r 25 -b:v 2M -minrate:v 2M -maxrate:v 2M -bufsize:v 1.4M -ac 2 -b:a 48k -mpegts_transport_stream_id 1025 -mpegts_service_id 1 -mpegts_pmt_start_pid 0x0fff -mpegts_start_pid 0x0121  -muxrate 2M -f mpegts -y mpeg2.fifo

I suspect that some of these parameters are surplus to requirements but these are what worked for me.

To use a webcam remove "dvgrab - |" from the start of the line and substitute "-i /dev/stdin -vcodec rawvideo"  with "-i /dev/video0 -vcodec mpeg2video"

To test that this step is working you can use mplayer to consume the video feed from the fifo file:
mplayer mpeg2.fifo

To transmit the video stream open another terminal window
cd ~/dvb-s
./dvbs_tx_hackrf.py

The transmission looks like this when received by gqrx on another HackRF.


How to receive the signal.

I used a standard DVB-S satellite TV receiver. However, these use an LNB which mixes the 10/11GHz signal with a 9750 MHz (or 10700 MHz) local oscillator (LO) to produce a signal around 1000-1250 MHz. In this case we do not use the LNB but connect an antenna directly to the input port where the LNB usually connects. 

WARNING: the antenna port has 13/18 Volts on the centre core. Do not allow your makeshift antenna to short across the inner and outer of the antenna port or you may damage your receiver.

In my example I have the HackRF Blue transmitting on 1000 MHz. I set the receiver to receive on 10750 MHz. As the LO is at 9750 MHz, 9750 plus 1000 = 10750. You need to know the LO your LNB is using (it is normally marked on them or try both values). So, I set the satellite receiver to scan for a signal on 10750 MHz. 

The other value the receiver needs to know is the symbols/second value. In the gnuradio program I have set it to 2 million symbols/second. Most satellite receivers will receive a minimum of 2m sym/sec, and this is the value you need to set in the receiver (or 2000k sym/sec). FEC can also be specified but my receiver set this to 'AUTO'.

Antenna

My satellite receiver is located underneath the television in an adjacent room to my study. Due to the use of a dummy load the transmission can only be received if the antenna from the satellite receiver is close to the dummy load. I used a length of satellite co-axial cable long enough to reach between both rooms, terminated one end with a F-type plug to fit the antenna socket of the satellite receiver. At the other end I connected the inner core of the co-ax to the driven element of a 1296 MHz beam I made recently. The outer core I taped up with insulating tape to ensure that it was not going to short to the inner conductor.

I haven't tried this but if you expose 7.5 cm of the centre conductor having cut back the outer sheath, the outer shield of copper and the inner dielectric (taking care not to short the inner and outer conductors) this should work as a quarter wave antenna at 1000 MHz. You will probably have to hold it very close to the dummy load connected to the HackRF Blue to receive the signal. 

WARNING: Wrap the centre conductor you expose in insulating tape to prevent accidental shorting as there is still 13/18V on the centre conductor.

With my 23 cm beam pointing at the dummy load I was able to receive the signal about 5 metres away.
 
References

Explanation of the ffmpeg parameters here and here.

Details of transmitting DVB-T using a webcam here.

Legal advisory

It is illegal to transmit on radio frequencies for which you do not possess a valid licence issued by your government. I hold an amateur radio licence so am allowed to transmit on a set of defined frequencies. However, for this experiment I transmitted into a dummy load, meaning that the transmission was not radiated more than about 3 metres.

For more information on becoming a radio amateur please contact your national amateur radio organisation. See the list here.

The small print

If some or other part of this doesn't work for you please don't send me a curt email saying "It doesn't work". It works for me on my system so try and understand why it doesn't work and adapt it to your environment.

Saturday, 15 March 2014

Multi-function AD9850 MEPT with WSPR, QRSS & Sequential Multi-Tone Hellschreiber (GPS & ntp versions)

My QRSS and SMT-Hell signals received by the PA9QV grabber on 40m

Building on my Arduino & AD9850 powered WSPR transmitter I have extended the code to also transmit QRSS CW and Sequential Multi-tone Hellschreiber.

The three modes are transmitted in sequence, although WSPR takes precedence. The tx cycle is something like this:
- WSPR
- QRSS
- WSPR
- SMT-Hell
- WSPR
- QRSS
etc.

I have had a problem where my GPS was not getting a fix and so I was not able to get the correct time for the WSPR transmissions. Consequently, I have created two versions of the sketch. One uses a GPS for its time source and the other uses the Internet Network Time Protocol (ntp). The ntp version requires an Arduino Ethernet shield and Internet connection.

I have learnt a huge amount about Arduino programming while working on this. However, I am going to stop tinkering with the programming now and use it to test out some different antennas.

The enhanced GPS sketch can be downloaded from here and the ntp version from here.
Note: you will also need to download and install a few libraries:


The alphabet in Sequential Multi-tone Hellschreiber,
monitored on my receiver.


There are three places that variables need to be changed in the sketch. These are:

QRSS frequency:
//***************Adjust this frequency to position your signal in the band
//*****************
#define QRSS_IDLE    10.139870e6

WSPR tones:
//*******************Create the WSPR tones for your callsign/qth/power using the instructions
//*******************on M1GEO's website http://www,george-smart.co.uk/wiki/Arduino_WSPR
//HOME: G0FCU 24dbm (300mw 24dBm)
/* static byte WSPR_DATA_HOME[] = {3,3,2,0,0,0,2,2,1,2,0,0,1,1,1,2,2,2,1,2,2,3,0,3,

QRSS/SMT-Hell text:
//******************enter your callsign in the next two variables, replacing the 'xxxxx'
//******************The callsign_hell can contain '/' or space as well as a locator
char callsign[]="G0FCU"; //callsign to send in QRSS mode
char callsign_hell[]="G0FCU/IO91SE"; //text to send in SMT-Hell mode


Tuesday, 4 March 2014

First try with QRSS

QRSS

My QRSS signal


Items #3 & #4 on my 'Things to do in my 30th Year as a Radio Amateur' were to have a go at QRSS.

The article by Ian Liston-Smith, G4JQT, in the February 2014 edition of Practical Wireless was instrumental in spurring me into action on this activity.

I had a look round the Internet and found several pieces of software that are specifically designed to receive QRSS signals. They were Argo, QRSS-VD and LOPORA.

I run Ubuntu Linux on my pc and setting anything up to run with sound cards always seems to be a little difficult (or maybe it's me).

I got Argo working quickly but it is a Windows program running on Linux so I spent some time getting QRSS-VD working. It is written in Python so will also work on Windows. It works well but the key to it was changing the bandpass low and high settings to ensure that the QRSS sub-band was being decoded. I haven't yet got LOPORA to work with my sound card yet.

The QRSS-VD website has comprehensive instructions on how to set up and use it, most of which I haven't yet read!


An example of decoding QRSS using QRSS-VD.

In summary I feel that QRSS combines the technology of receiving QRPp signals using the power of your computer to decode them (along the lines of WSPR) with the beauty of being able to decode them yourself.

In practice, combining QRSS and WSPR is a great way to analyse propagation and antenna performance. I have amended my Arduino/AD9850 based WSPR transmitter so that it transmits alternatively between WSPR and QRSS. More of this in a future blog post.


Tuesday, 31 December 2013

Arduino & AD9850 based WSPR transmitter - continued

Arduino & AD9850 based WSPR transmitter - continued


I have been improving the WSPR transmitter. I noticed that when setting it to transmit every other minute the code did not actually work. I think this was because after the tx period had ended the time that was in the serial buffer from the GPS was from before the tx period started. This consequently caused all sorts of problems.

There is no way to flush the serial buffer so I solved this by reading the time from the GPS for 1000ms after the tx period has completed. This allows the stale time to be read and discarded and the up-to-date time to be captured. After this 1000ms period a variable is reset to change the read time of the serial buffer back to 250ms.

The other significant change I have made is to what happens when the tx period has ended but it is not required to transmit in the subsequent 2 minute period. In the old version this was implemented crudely by using a delay of 5 seconds. This actually doesn't work because the tx period ends at around 51 seconds of the odd minute. Thus the delay actually needs to be around 15 seconds, to 5 seconds past the even minute to miss the tx period. I have now implemented this in code, this means that I can start to think about implementing a web based front end.

I don't intend to replace the delay of 682ms used to transmit each WSPR tone at the moment. As this is so time critical I will avoid it for now!

The code for the latest version (v6) can be downloaded here.
Note: you will also need to download and install a few libraries:


I made a homebrew Arduino shield incorporating the AD9850, the MAX232 chip and relay to switch the amplifier on, as shown below.


Sunday, 6 October 2013

Arduino and AD9850 WSPR Transmitter


I recently got an Arduino Uno. The glut of cheap AD9850 boards on e-bay made one an obvious first purchase to complement the Arduino. I made an Arduino and AD9850 VFO which was a good learning experience but I didn't have any immediate need for a VFO.

I have been wondering about the efficiency of my HF antennas recently and I fired up WSPR
on my pc one day. Immediately I realised that an Arduino and AD9850 powered WSPR transmitter would be possible.

Of course, someone had published a similar project on the Internet. George Smart, M1GEO, has posted a project on his web pages describing an Arduino based AD9851 WSPR transmitter. However, there are some crucial differences between the two chips and I also found that George's Arduino code didn't work well with the GPS I was using.

So, my project is based heavily on M1GEO's, but with additional help and information provided by other web pages. My own contribution is largely in enhancing the Arduino code and integrating the project from various sources.

Challenge #1 - accurate timing

WSPR relies on stations starting to transmit between seconds 1 and 4 of even minutes. Consequently an accurate time source is necessary. I already had a GPS 'puck' and it is a trivial task to connect a GPS to the Arduino using the TinyGPS library. However, the Arduino is expecting a TTL level signal from the GPS and my device outputs RS-232. Hence, a converter between the two voltage levels is required. Fortunately there is a handy chip that does this called the MAX232. Connecting this between my GPS and the Arduino meant that I was able to use the TinyGPS library to receive the NMEA sentences from the GPS. If you use a GPS module like the one described in this article, you will not need the MAX232 chip.

Challenge #2 - differences between the AD9851 and AD9850

There are two main differences to be aware of. Firstly, the AD9850 has a different oscillator frequency, it uses 125Mhz whereas the AD9851 uses 180Mhz. Secondly, the AD9850 requires a different set of pins to be set HIGH to enable serial mode, ie. to be able to write data to it serially rather than in parallel. Pins RESET, CLOCK and LOAD all have to be set HIGH (pins labelled RESET, H_CLK and FU_UD respectively on my DDS module).

Challenge #3 - switching an amplifier

The output from the DDS module is very low. I am feeding this to a QRP HF amplifier which generates around 250mW. However, I needed to switch the amp on and off in line with the times when the WSPR signal was being transmitted. It is easy to set a pin on the Arduino to HIGH at the start of the transmission sequence and to use this to drive a transistor switch connected to a relay, as described here. The relay switches the power to the amp on and off.

Challenge #4 - generating more power from the HF amplifier

To be continued, my amplifiers never seem to be able to output more than a couple of hundred milliwats so I need to do some more work here.

Challenge #5 - building an effective low pass filter

A low pass filter is essential to ensure no harmonics are transmitted. I've not had much success building these either so am going to work on this next. buy an LPF kit from Hans Summers, G0UPL For £2.50 you can't really go wrong. I bought filters for 20m and 30m so at some point I will implement antenna switching as well.

Arduino Sketch

The Arduino sketch I have modified and that works for the AD9850 and my GPS can be downloaded from here. You will need to generate the WSPR tones as described in M1GEO's post here and amend the sketch with tones specific to your callsign, location and power level. If you use this version please add a line to turn off the GPS interrupts during the WSPR tx period, add 'ss.end();' between lines 141 and 142.

I have since added a 4 line by 20 character I2C LCD display. I have also fixed the timing issue that didn't seem to occur without the LCD but is caused by interrupts from the GPS delaying the internal clock thus making it useless for WSPR. The updated version can be downloaded here.

Note: you will also need to download and install a few libraries:

If you open the Arduino serial monitor when the sketch is running you will see the timing string from the GPS and when the WSPR tx is activated.

Here is a picture of my Arduino Uno, AD9850 DDS board and breadboard with the MAX232 chip and amplifier power switching circuit - ugly at the moment but it works.